Home & Garden
What to Do If Your Pipes Freeze Overnight

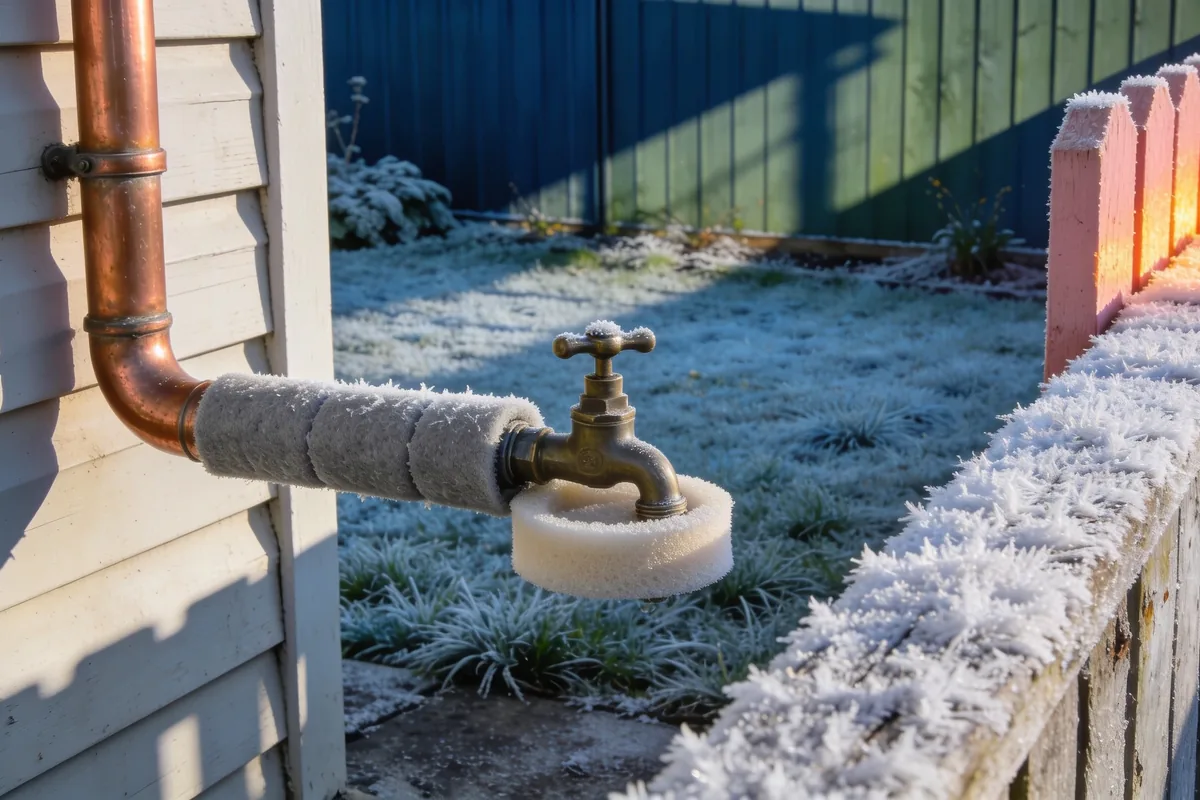
A frozen pipe is rarely the emergency. The emergency is what happens when it thaws. Water expands as it freezes, and the ice can split copper, crack a plastic fitting or push a joint apart without any of it being visible while the line is still solid. The damage shows itself when the ice melts and water starts running where it should not. That is why the order of what you do matters: find the freeze, stop the supply, warm it slowly, and watch for the leak the thaw may reveal.
How to tell a pipe has frozen
A frozen pipe makes itself known in a few ways, and the pattern is what identifies it.
The clearest sign is a tap that gives nothing or a trickle while the rest of the house runs normally, which points to a single frozen branch rather than a supply problem. A toilet cistern that will not refill, or refills painfully slowly, tells the same story. On pipework you can see, frost or a bead of condensation on the outside of the lagging is a direct sign, most likely on an external wall, under the floor or in a roof space. After a freeze, the second wave of signs arrives with the thaw: damp patches, a dripping joint, a hiss behind a wall, or the sound of water running when every tap in the house is closed.
The place to look first is the pipework that has the least protection: outdoor runs, garden taps, pipes on a southern or shaded wall, and any section exposed to wind under the floor.
Shut the water off first, and know where the valve is
Before warming anything, stop the water at the main. If the frozen section has already split, the ice is the only thing holding the water back, and the moment it melts the leak starts. Isolating the supply turns a potential flood into a controlled job.
The main valve is not always where a homeowner expects. In most houses it sits at the water meter near the front boundary, often in a small box or pit at the fence line. If the house has been extended or the front yard reshaped, the meter may be elsewhere than the obvious spot, and in units and flats it is usually with a bank of meters in a common area. If the valve cannot be found quickly, the next places to check are the point where the water enters the house, commonly under the laundry or kitchen sink, and any tap the previous owner marked. A valve that has not been turned in years can seize, and a seized valve is a job for a plumber rather than for force.
This is worth settling before winter rather than during it. Find the valve on a warm afternoon, turn it off and confirm a tap runs dry, then turn it back on. A valve you have tested once is a valve you can trust at 2am.
Thaw it gently, working back from the tap
Once the supply is off, open the nearest tap and start warming the pipe from the tap end, working back towards the frozen section.
The direction matters. Warm the tap end first and the first water to melt has somewhere to go: it runs out of the open tap instead of being trapped behind the remaining ice. Work from the middle first and the melting water has no exit, so pressure builds inside the pipe against the ice plugs, which is the same force that split it in the first place. The tap end first, then a little further along, until water begins to flow.
The heat source matters just as much. A hair dryer on its low setting is close to ideal: warm air that can be moved along the pipe, no flame, and a temperature unlikely to harm the material. Hot water bottles and towels wrung out in warm water do the same job more slowly. What to avoid is everything hotter and faster. A heat gun or a blowtorch concentrates heat that can crack a pipe through sudden expansion, ignite insulation or timber inside a wall, and boil trapped water into steam. Boiling water poured straight onto a frozen pipe can shock the metal into cracking. Warmth, applied gradually, is the whole technique.
If the frozen pipe is inside a wall
A pipe inside a wall is the case where patience earns the most. Open the cupboard doors under the sink or beside the wall so warm room air reaches the pipework, and keep the room warm while the pipe thaws. If the frozen run is behind plaster, ambient warmth is the safe method and it may simply take longer.
Do not attack the wall with a heat gun or an open flame, and do not cut into the plasterboard to chase the freeze unless a plumber advises it. If nothing flows after a reasonable period of gentle warming, the freeze may be further along the run or the pipe may already have split, and the next move is a plumber rather than more heat. Note where the cold was worst while you wait, because that is the spot the prevention work needs to address.
The leak check once the water runs
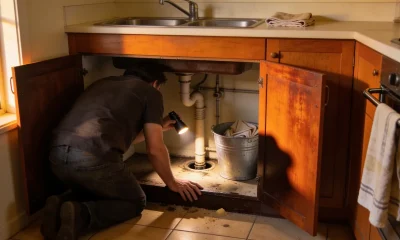
When the water flows again, do not simply close the tap and walk away. Walk the run with a torch: the joints nearest the frozen section, the fittings, and the floor or ceiling below any concealed pipework. A drip at a joint is common after a freeze, and a split often weeps rather than sprays.
If a joint drips, the supply can be isolated at the main and the repair booked as an urgent job rather than an emergency. If water is running from a split, or a ceiling starts to bulge, shut the main off again and call a plumber immediately. Some of the damage from a freeze is not dramatic on the night; it appears days later as a damp patch or a rising water bill, which is the same pattern as the plumbing problems that start small and get expensive, and the reason the leak check is not optional.
When to call a plumber
Some freezes can be handled from the tap, and some cannot. The situations that need a licensed plumber are consistent: water that will not stop when the main is reopened, a visible split or a joint that will not hold, a freeze inside a wall or under a slab, and any case where nothing flows despite careful warming. A plumber is also the right call where the main valve is seized, where the frozen run has burst before, or where the household cannot safely reach the pipe, such as a roof space in bad weather.
Emergency work is the wrong moment to choose a plumber for the first time. It helps to know in advance which local emergency plumber covers the area, what its after-hours process is, and how a call-out is charged before anyone is dispatched. A number saved in advance, with those questions already answered, is the difference between a controlled repair and a scramble.
Preventing the next freeze
Every part of the work above is easier the second time, which is one reason prevention is worth an afternoon before winter settles in. The aim is to keep the heat in and the wind off the pipework that froze.
- Lag the exposed runs. Foam lagging over outdoor pipes, garden taps and the sections under the floor slows heat loss and is the single most useful measure.
- Fix dripping taps. A tap that drips keeps a thin film of water moving through the pipe, and that film is what freezes first on a cold night.
- Disconnect hoses and empty the outdoor tap. A hose left connected holds water against the tap, giving the freeze somewhere to start.
- Shelter what the wind reaches. Even a baffle around an exposed pipe run changes how quickly it loses heat on a clear, windy night.
- Open the cupboard doors on external walls during a cold snap. Warm room air reaching the pipework under a sink is often enough to keep it above freezing.
- Leave a tap to trickle on the coldest nights. Water that is moving through the pipe freezes more slowly than water sitting still, so a slight flow through the run most at risk takes the edge off the worst hours.
- Sort out the worst run. If the same pipe freezes every year, ask a plumber about re-routing it or improving the insulation, because the pattern will repeat otherwise.
The strongest version of this list is written before the first cold night, not after the first broken pipe. A house with lagged pipes, cleared garden taps and a tested main valve has converted most of this article into something that never has to happen.
The order to remember
Find the freeze, because the signs are usually at one tap rather than the whole house. Stop the supply, because the ice may be the only plug in a split pipe. Then thaw slowly from the tap end, so the water has somewhere to go, and check for leaks before you close the tap, because the thaw is when the damage shows. Prevention belongs to autumn rather than to the night it happens; done early, it is the step that means the rest of this page never gets used.






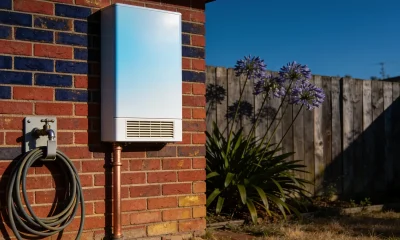


Most of the diagnosis happens before anything is bought. Winter damage is not one condition, and no single purchase fixes all three, so a lawn that is brown in August can be a dormant lawn, a compacted lawn or a dead lawn, and those are three different jobs with three different costs. The first check costs nothing and takes a minute: examine the crown, the base of the leaves, and read the colour. Everything else follows from that reading.
Spring lawn recovery checklist
0 of 9Work top to bottom. The crown test at the top decides whether the rest is worth doing.
The spring order
Recovery takes weeks, not a weekend. If the crown is not white to off-white, the answer is fresh turf, not a treatment.
The crown test, and what each answer means
The crown is where the plant keeps its growing point, so it is the part that says whether there is a plant left to work with. If the crown is white to off-white, the grass is probably still alive, and it can be salvaged with dedication and effort. The test is a five-minute job with a fingernail or a knife at the base of the leaves, and it settles the question the whole checklist depends on.
If the crown is not white, the answer is the hard one. The source is direct on this point: a lawn allowed to die completely will not come back in winter, and fresh turf is the replacement. Watering a dead lawn does not resurrect it, which is why the crown test comes before any purchase, and why the order in the checklist above is not arbitrary. A white crown means the work is justified and the recovery is a matter of weeks; anything else means the money is better spent on turf, and the rest of the list has nothing to offer.
The test also has limits. It reports on the plants in the sample, not on the whole lawn, so it should be run in several spots, including the worst one. A green corner can flatter a lawn that is mostly gone, and a brown patch can hide crowns that are still white, which is why several samples beat one confident glance. It says nothing about why the lawn reached that state, either. That is the soil question underneath it.
Why winter does this
Cold slows growth, which is the dormant lawn and the ordinary case. Wet soil compacts under weight, which is the second case, and the mechanism matters because it explains the recovery order later: in compacted ground, water and air cannot reach the roots, so the grass starves while the surface looks as though it has been watered plenty. Shade and traffic do the rest of the damage between them.
The result is a lawn that can be over-watered and under-fed at the same time. The surface holds moisture, the roots do not get what they need, and the thatch builds up between the two. That is the whole mechanism in a sentence: compaction starves the roots, and the surface hides it. None of that damage is visible from the street, which is why the diagnosis has to go below the surface before the order of work makes sense.
The three cases also explain why the spring work is ordered as it is. Aeration addresses the compaction; the wetting agent addresses water that will not soak in; top dressing addresses the layer between the two. Feeding addresses none of them, which is why it comes last. The order exists because of that mechanism: each step removes an obstacle for the next.
The spring order, and why it is this order
Aeration comes first. It creates small holes so air and water penetrate to the roots, which is the compaction problem addressed at its source, and it is the step that treats the cause rather than the appearance. The source’s specification is holes at least 8 centimetres apart; a pitchfork handles a small area, pronging shoes do the same job as the reader walks, and larger lawns justify hired equipment. The timing for warm-season grasses, which include soft-leaf buffalo, couch, kikuyu and zoysia, is spring, before the summer heat, and the source adds the line that matters for a brown lawn: it is never too late to aerate.
Top dressing comes immediately after aeration or verti-mowing, not weeks later, which is the sequencing most home lawns get wrong. The source’s reason is mechanical rather than aesthetic: the holes are open and the dressing has somewhere to go. Then a quality wetting agent, applied after the dressing, because the source’s own note is that aeration helps manage thatch so wetting agents can penetrate. Then water.
The order is not a preference. Each step opens the way for the one after it: the holes let the dressing in, the dressing and the agent let the water down, and the water finishes the job. Reversed, the same materials sit on the surface and the weekend is spent. That is the sequence in one line: open the soil, dress the soil, wet the soil, then water it. The container on the shelf is not the first step, and on a lawn that has been compacted for years it is nearly the last. The same order applies to a lawn that is only patchy: fewer holes, less dressing, and the same sequence. The crown test decides the case, and the order decides the work.
Where the lawn is beyond saving, the order changes completely. Poor soil is amended or removed and replaced before fresh turf is laid, not after it fails.
Watering, measured rather than scheduled
Watering is where the calendar does the least good and a physical test does the most. The source’s test needs no equipment: tread firmly on the grass, and if it does not spring back, it needs a drink. That reading comes from the plant rather than from a timetable, which is why the test comes before the sprinkler goes on rather than after.
Water in the morning, when there is usually less wind, because the aim is to cut evaporation and get the water down to the roots. The morning run gives the water the best chance to reach the roots before the day’s evaporation starts, which is the only reason the timing is specified. Sprinklers run on the reader’s own watering days, which is a local rule and not something this article can set. It is also the variable that governs everything else in a dry month. The test replaces a schedule with a reading, and the difference matters on a lawn that is recovering, because the water it needs changes as the roots come back.
Water that never reaches the roots is a problem to trace at the source as well, and the site’s guide to stopping a leaky tap covers the other place water disappears on a property.
Mowing as recovery, not maintenance
Mowing during recovery is a cutting decision with two variables, height and frequency, and both follow the variety. For soft-leaf buffalo, the source’s figures are every 7 to 10 days in summer at about 15 to 20 millimetres, which is a higher cut than many lawns receive.
Sharp blades matter more than the height setting. The source goes as far as suggesting a blade change about once a year, because a blunt blade tears grass rather than cutting it, and torn tips are open wounds during the season when the lawn is under pressure. Fewer, higher cuts are the shape the source describes for recovery: mow to the frequency the variety expects, and leave the height where the source puts it.
The limit here is a variety question the article cannot answer from the outside. The mowing height for a specific lawn depends on what is growing in it, and the variety is on the tag, the turf supplier’s record or the original invoice. Mowing is the step where the variety matters most, and the one where a general number is least safe. The source’s figures describe one grass, and they are not a table for all of them.
When it is not the cold at all
Two alternative diagnoses deserve a check before any purchase, because both imitate winter damage and neither responds to the spring order above. Both should be eliminated before the order is followed, because a lawn with either problem will not answer to it.
The first is grubs, which eat the new shoots. Watering does not fix a grub problem, which is the tell: a lawn that stays brown despite moisture may be feeding something else. The second is hydrophobic soil, a known behaviour in sandy ground, where the soil repels the water being applied rather than absorbing it. A wetting agent is the step the order above addresses for that case, and the check is to watch where the water goes when it lands: if it beads and runs, the soil is the problem rather than the grass.
What the article cannot know from outside is which of these applies to a given lawn. That is a sample-and-look question, and the source’s own warning stands over it: where the grass has died completely, watering alone will not bring it back. The limit deserves saying plainly: a photograph cannot show a grub, and a soil that repels water looks the same in a picture as a soil that is dry.
The order that saves the most grass
Recovery takes weeks, not a weekend, and the cheap steps come first. The crown test costs nothing and decides the whole approach. Aeration, top dressing and a wetting agent cost time and modest materials, and they address the compaction that caused the problem. Feeding and heavy watering come last, because a dead lawn does not respond to them and a live one responds better once air and water can reach its roots.
The order is the saving, and it has a check built in at the top. If the crown test comes back white, the rest of the list is worth the work; if it does not, the money belongs in turf rather than in treatments. The cheapest steps are also the earliest ones, which is what the whole order is built on. Run the checklist in sequence, revisit the crown test at the end of spring rather than the end of the week, and the grass that was dormant in August gets its season back.
The list takes a weekend; the results take a season. Everything above is arranged to make the first of those as small as possible. The check at the top is also the one to repeat, at the end of spring, when the answer is either a greener lawn or a clear case for turf.
Sources: Water Corporation – Bring your brown lawn back to life

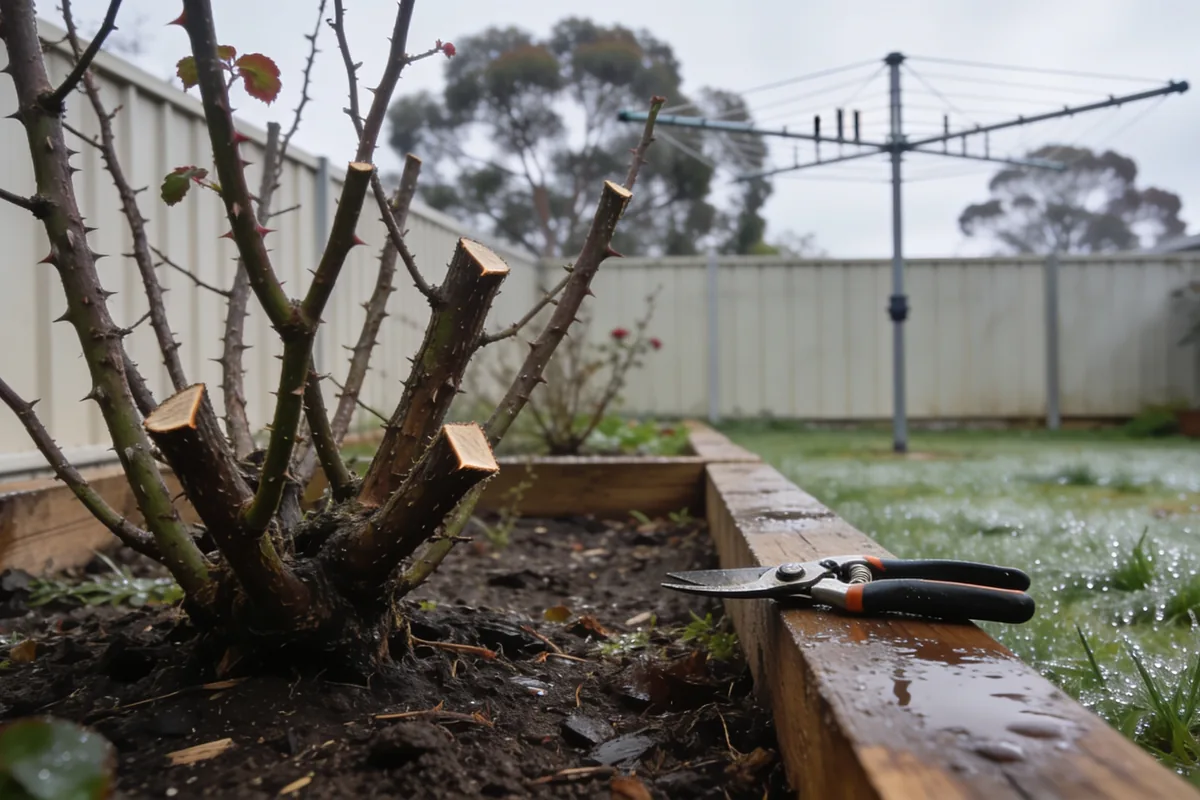
The secateurs are out, the last flowers have gone, and one question is keeping you indoors: is it too early? That worry is a reasonable one, and it deserves a straight answer. Cut a rose back a week before the frosts arrive and the new shoots come away soft; the next cold night takes them, and you spend spring looking at the damage. Here is the reassuring part. The timing is a window rather than a skill, and it is wide enough for most gardens. In most of Australia, the best time to prune roses is June or July. If you live in a really cold area, the advice is to wait until early August, so the frosts do not knock back the new shoots. Most gardens sit comfortably inside that window, and the difference between cutting this weekend and next weekend is far smaller than the difference between cutting now and cutting in May.
It also helps to know which prune you are doing. Roses want attention at least twice a year: a summer dead-heading, where each spent flower is snipped a few centimetres below the bloom, and the harder winter cut that shapes the plant for the season ahead. The June and July question is about the second of those, and it is the one where timing matters. The summer job is forgiving. The winter one is not, because it happens next to the cold. You do not need to be an expert to get this right. You need a pair of sharp secateurs and a week without frost.
One catch sits under all of that, and it is why this question never has a single date. Winter means different weeks in Cairns, in Melbourne and on the Tablelands, and local frost decides your week rather than the month on the calendar. Check the forecast before you check the date.
Why winter is the right season for the hard cut
Winter pruning works because the plant is resting. It is dormant, so the cuts are open but new growth is slow to arrive, and fewer pests and spores are moving about. The frost rule comes from the same place: it is not the cut itself that damages the bush, it is the soft growth a cut encourages too soon, before the cold has finished with your garden. Patience here is not caution for its own sake. It is the whole technique.
The second reason is air. Opening up the centre of the bush so there is more air circulating is a disease measure, not a tidying one. Air moving through the middle, and light reaching the wood, are the point of the exercise, and anything overhead changes how much light gets through. If your roses grow under a patio or a carport, the site’s guide to polycarbonate roofing over a garden is clear about what a cover does and does not change for the plants below it.
There is one more quiet benefit to cutting in winter. With the leaves gone, the frame of the bush is bare, and the shape it will carry into spring is finally visible. That is why this is the cut that sets the structure, and why a few minutes spent looking before the first cut is time well used.
The four cuts that do the work
Four cuts, in this order, do almost everything a winter prune needs to achieve. Work from the top of the bush downwards, and step back between cuts to look at the shape you are making.
- Anything dead, or anything showing dieback, right down to stump level. A stub left below a dead stem is no use to the plant, so take the cut back to sound wood.
- Spindly stems. Follow each one down until it is about the thickness of a biro, and remove it there. These are the stems that will not carry a flower worth waiting for, and they take light and air from the ones that will.
- Anything crossing or crowding the centre. Where two stems rub, keep the one growing outward and take the other, so the middle of the bush opens up and the air can move through it.
- The water shoots, and only lightly. These are the young stems, olive green or pink, and they are where the flowers come from, so they get a tidy rather than a haircut.
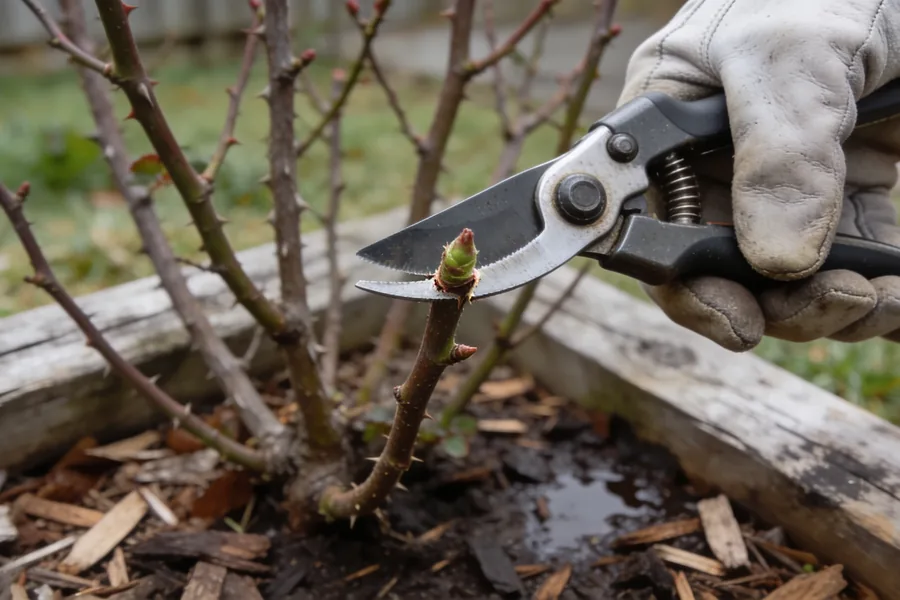
When you make the cut, aim for about a 45 degree angle above an outward facing bud, sloping away from the bud. Rain and dew then run off instead of collecting where the new shoot will form, which is a small thing that helps keep fungal disease away from the wound. The outward-facing part matters for the same reason as the centre cut: the new shoot grows away from the middle of the bush rather than back into it. Work through the four in order, and stop when the middle is open and the strong stems are clear.
How hard to go
How far back you go is a judgement, and the sources offer a scale rather than a rule. If you are a cautious pruner, take about a third off. If you are confident, or the bush has run wild, you can go back by about half. Both are given as sensible choices, so pick the one that matches your confidence and the rose in front of you.
What does not flex is the direction. Cut from the top, and cut to a bud that faces the way you want the new shoot to grow. Every cut is a decision about next season’s shape, which is why stepping back matters more than cutting fast.
There is one more piece of restraint in the sources. Do not rush the winter prune. Let the plant rest first, so the last flowers are enjoyed and the young stems have time to harden off before the cold settles in. A bush pruned in a hurry is a bush that spends winter working instead of sleeping.
And if the two options still feel far apart, the choice comes down to confidence and to the bush in front of you, which is how the source frames it, rather than to a number that has to be exact. A third and a half are both inside the practice. The window matters more than the depth.
The roses that play by different rules
Not every rose in the garden wants the same treatment, and the differences are worth knowing before you start on the row.
- Heritage roses need very little. A light shape, a tip prune and anything dead removed is the whole job, and nothing more is asked of them.
- Ground cover roses can be cut back almost to ground level. They regrow by spring, particularly with fertiliser and mulch through the warmer months.
- Repeat flowering roses are pruned three or four times in a season. The winter prune is the hard one; the others are lighter, and it is the severity that changes, not the technique.
The three or four prunes in a season are not three or four winter prunes. The hard cut happens once; what follows is the light tidying after each flush of flowers, and the bush barely notices it.
The caution from the sources deserves repeating here. In a frost-prone area, leave the pruning until the chances of frost are over. Prune early, and the warm spell that follows can push new growth straight into the next cold night. If the bush has not finished dropping its leaves, it has not finished resting either, so wait.
One more case needs naming, and it does not fit a rule. If your rose flowers on last season’s wood, the winter prune is a different conversation, and it is a question to ask about your own plant rather than something a page can settle. Take a photo of it in flower, ask at a nursery, and prune the rest of the row while you wait for the answer. That is not a gap in the advice, just the limit of what advice can do without seeing the plant.
What to do with the prunings
The prunings go to the bin or the mulch pile. If you have small children at home, sorting the garden waste is one of those jobs they can genuinely take part in, and the site’s piece on recycling ideas for preschoolers turns the sorting into something closer to a game than a chore.
The one thing not to do is feed or water the bush heavily straight after the cut, hoping to push it along. The growth that encourages is soft growth, and soft growth is what the frosts are looking for. Hold the heavy feeding until the cold has passed and the plant is ready to use it. The same restraint applies to water. The instinct after a hard cut is to give the plant something to work with, and the season says otherwise.
Where to make the first cut
Before you start, three checks, and together they take about five minutes.
- Is there a frost forecast in the next week or two? If there is, wait, or start with the roses that sit outside the frost pocket.
- Has the bush lost its leaves? If it is still holding them, it has not finished resting yet.
- Are the secateurs clean and sharp? The job is hard enough without fighting the tools.
Then start where the answer is easiest: the dead wood. The first cut is the one that feels like a decision, and a dead stem is the one cut nobody can get wrong. After that the bush tells you what it needs, and you will wonder why you put it off. And if the forecast turns, nothing is lost by waiting a week. The window is June and July for most gardens and early August for the cold ones, and it will still be open when the frost has gone.
If you are new to roses, the first winter is the one where every cut feels like a risk. Start with the dead wood, take the spindly stems after that, and leave the water shoots alone until you have watched them flower once. The next winter will feel like routine.
If the forecast looks clear and the bush has dropped its leaves, you are ready. Start at the top of the bush, work down, and let the first cut tell you how the rest will go.
Sources: Gardening Australia – Rose Pruning · Heritage Roses in Australia – Rose Pruning
Most of the expensive plumbing repairs in a house begin as something a homeowner decided was probably nothing. A faint damp patch, a cistern that refills at night, a knock when the tap closes. Each of those signs is genuinely small, and that is what makes it easy to postpone. The trouble is that plumbing faults do not stay the size they start. What follows is a reading of the common small signs: what each one means, and what it turns into.
What a damp patch under paint means
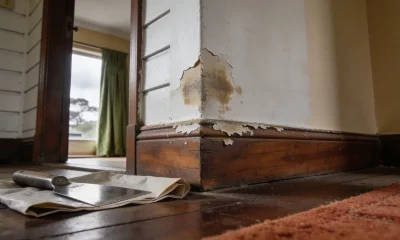
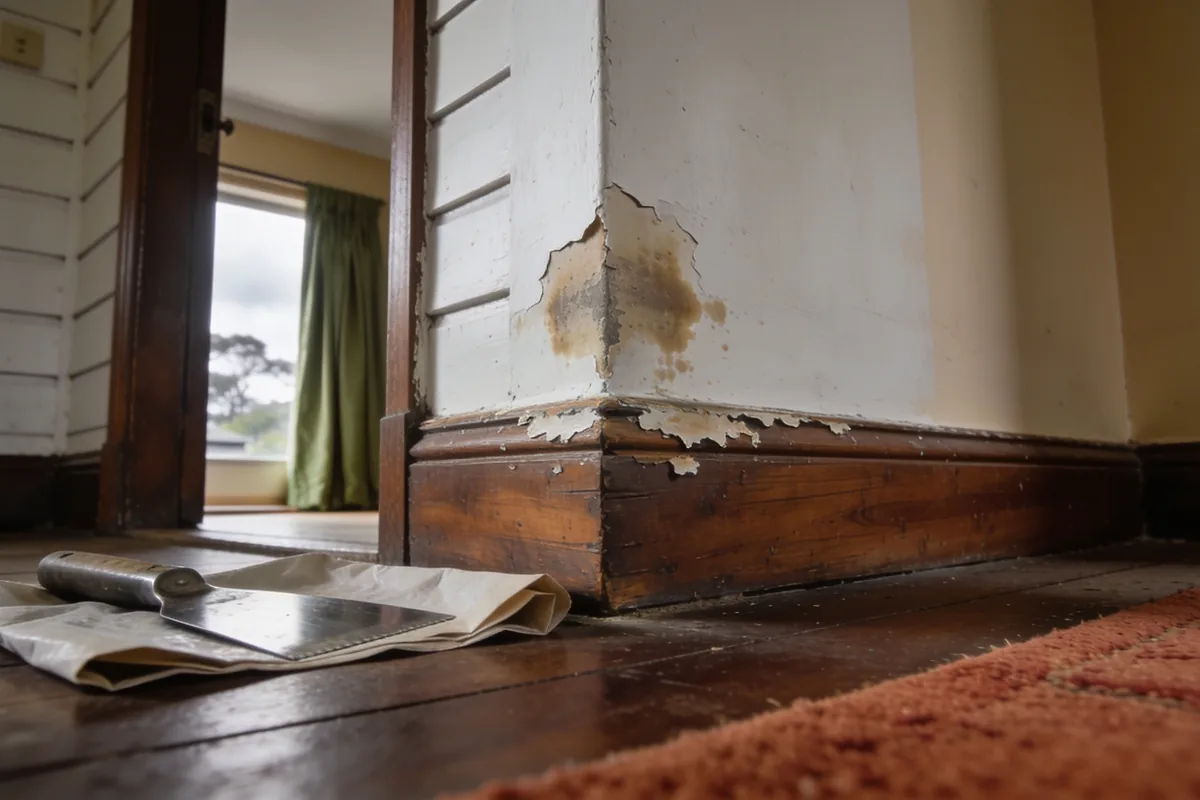
Paint does not bubble for no reason. When a patch of paint lifts away from the wall or a stain spreads from a corner of a ceiling, water is arriving from behind the surface, and the paint is the last layer to notice. The usual sources are a leaking pipe or joint inside the wall, a failed shower or balcony membrane above, or roof or gutter water finding a path down a cavity.
The reason to treat this sign seriously is not the patch. It is that the water is already inside the structure, and the surfaces that absorb it, plasterboard, timber framing and skirtings, are the ones that are expensive to replace. A damp patch that smells musty has usually been wet for a while. The check a homeowner can run is to note where the patch grows from and whether it changes after rain, then get it looked at before repainting, because paint over a damp surface will bubble again within the season.
The cistern that runs quietly
A toilet that hisses gently between flushes, or refills when nobody has used it, is losing water continuously and into the sewer, so there is no puddle to find and no sound loud enough to be obvious. The dye test settles it: colour in the cistern water, wait without flushing, and check the bowl. Colour in the bowl means the seal is passing.
The fix is usually a flush seal or an inlet valve, both inexpensive parts. Left alone, the fault wastes water every hour and worsens as the seal deteriorates, and the higher bill is the first symptom most households notice.
What water hammer does to joints
A single sharp knock when a tap closes is a pressure pulse running back through the pipe. The pipe moves, the pulse fades, and nothing is harmed. When the knock repeats and arrives with a shudder, the same force is cycling through the joints, fittings and fixture connections several times a day, and the joints are the parts that eventually give way. So an ongoing knock is a cause of failure rather than a warning of one, and that is why it deserves attention even when nothing is leaking yet.
The response has two parts. Loose pipework that can move with the pulse should be secured, because movement is what works the joints, and a plumber can measure supply pressure and address anything at the high end of the range that is driving it. The pattern to watch is a knock that has become louder or more frequent, which is the version that belongs on a repair list rather than a to-do list.
What pooling around the foundation threatens
Water that stands against the house after rain is doing more than making the garden boggy. Where the ground stays saturated, moisture moves towards the slab edge and the footings, and in reactive clay soils the wetting and drying of the ground around a house is what drives movement in the structure. Long term, that means cracks in brickwork and internal plaster, doors that stick with the seasons, and damp creeping into floors.
The sources are usually stormwater: gutters and downpipes discharging against the wall, an overflow relief gully in the wrong spot, or a surface drain that has silted up. The checks are to watch the roof drainage in real rain, confirm the ground falls away from the house, and have blocked stormwater cleared. Pooling that appears in the same place after every storm is a drainage fault, not bad luck, and it belongs on the repair list for the damage it does to the building rather than to the pipe.
Slow drains that keep slowing
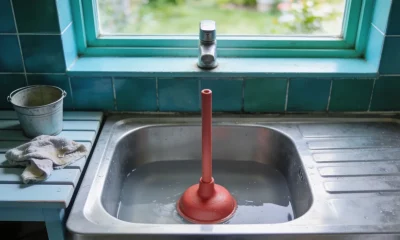
A drain that is a little slow is easy to live with, which is exactly the problem. Where the slowdown is steady, the pipe is narrowing, whether from accumulated grease, scale, or roots entering at a damaged joint. Where the same drain blocks twice in a season, the pipe itself is damaged and the blockages will keep returning until the pipe is repaired.
The differentiation matters for what to do. A single slow drain can be cleared and watched. A drain that repeatedly blocks in the same section belongs on a camera inspection, because the alternative is clearing the same blockage every few months until something more urgent fails. The six faults behind most household plumbing problems, this one included, are set out in the guide to the most common problems homeowners face.
Strange noises as the early warning
Pipes that have started talking are carrying information: a gurgle after a drain points to air being pulled through a partial restriction, a whistle at a tap points to a narrowed opening or high pressure, and a rattle points to pipework that is no longer held firmly. The sounds are rarely urgent on the day they start, and they are the cheapest diagnosis a house ever offers. What each of the noises in your pipes usually means is worth knowing before a knock becomes a leak.
Rusty water and older pipework
A rusty tinge in the first water out of the tap in the morning is the inside of the pipe announcing itself. In homes that still have their original galvanised steel plumbing, that corrosion runs through the whole system, and it shows up in stages: colour in the water, then weaker pressure as the pipe narrows, then pinhole leaks in the parts of the line that cannot be seen. Neither the colour nor the pressure is an emergency on its own, and together they are a reason to have the pipework assessed rather than patched. The assessment is also the moment to plan the replacement at the household’s pace, which is far cheaper than meeting it as an emergency.
Why acting on the signs pays
The economics of plumbing are unusually lopsided. Almost every fault on this page is a small repair at the sign and a large one at the symptom, because the damage a slow fault does is to the surfaces, structures and finishes around it, and those cost more than the pipework. A joint that weeps inside a wall is a joint repair; the same joint found through a bulging ceiling is a joint repair plus plaster, paint, joinery and an insurance conversation. Nothing on this list rewards waiting, and the free checks, the meter, the dye test, and the ground after rain, cost nothing to run.
The order of response matters as much as the speed. A sign that can be tested should be tested first, because the meter test and the dye test cost nothing and tell a household whether it is dealing with a leak, a cistern, or neither. What remains after those checks is worth describing carefully when a plumber is booked, since a symptom described accurately is a diagnosis that arrives faster, and a household that knows what its signs mean gets more out of the visit than one that lists everything and hopes.
After hours: what actually counts as urgent
Not every plumbing fault needs an after-hours call, and calling one for a drip wastes money. The situations that do qualify are consistent. Water you cannot stop, from a burst pipe or a failed fitting, is the clearest case. Sewage visible or backing up into the house is the second. No water at all in winter, with the cause unknown, belongs on the list because the failure behind it rarely improves overnight. Everything else, a slow drain, a running cistern, a knock in the pipes, can be booked and planned, provided it is genuinely booked rather than forgotten.
Acting on the signs
The rule that separates a cheap plumbing year from an expensive one is simple: match the response to the sign rather than to the disruption of fixing it. Damp patches, running cisterns and repeated blockages are instructions to act early. Noises, rusty water and a knock are instructions to watch and plan. Water you cannot stop is an instruction to call now. The signs are all cheap to read, and they are the only warning a house gives.


 Healthcare1 year ago
Supported Independent Living Explained: What SIL Covers and Who It Suits
- Food1 year ago
Balance Your Plate, Boost Your Mood: Beginner’s Guide to Eating Well
- Healthcare1 year ago
Oral Health at Every Age: What Changes and What to Watch For
- Healthcare1 year ago
The Allergy You Can’t See: How to Detect and Manage Silent Food Reactions
- Healthcare1 year ago
Occupational Therapy for Children: The Signs It Could Help, and How to Start
- Business1 year ago
Connections That Count: Why Networking Is Still Crucial for Business Success
- Healthcare1 year ago
Tired of Plantar Fasciitis Pain? Shockwave Therapy Could Help You Get Back on Your Feet
- Healthcare1 year ago
Home and Living Support Under the NDIS: What It Funds and How It Fits a Plan